Have you ever wanted to revisit a café or shop you stumbled upon a few weeks ago, only to realize you cannot remember its name? You check your camera roll, find no photos, and realize you never wrote a note either.
Logging every stop by hand rarely sticks, but with the right iPhone settings, your phone can automatically keep a record of the places you visit just by carrying it around as usual.
There are two main ways to automatically track the places you visit on an iPhone: using Timeline in Google Maps, or using a dedicated location history app.
This guide explains how automatic place tracking works on iPhone without draining your battery, compares the two approaches side by side, and walks through how to set up and use each one.
How Automatic Tracking Works on iPhone
When people hear about continuous location tracking, a common concern is battery drain. In practice, automatic visit logging does not keep full GPS running nonstop.
Apps that automatically record places on iPhone generally rely on one of two approaches:
The first is periodic background saving through Google Maps Timeline. When Timeline is turned on, Google Maps periodically saves your device's location in the background—even when the app is closed—building a chronological history of your routes and stops.
The second is Apple's built-in iOS visit detection. Rather than polling GPS every second while you sit still, iPhone detects meaningful transitions—when you arrive somewhere, stay for a while, and then leave. Because it avoids constant positioning when you are not moving, it can log the places you stay while keeping battery impact low.
Google does not publish the exact sampling intervals or internal methods Google Maps uses on iOS, so it is not necessarily identical to Apple's visit detection. Either way, both options share the same practical benefit: once you set them up, you simply carry your iPhone as usual and can look up where you went afterward.
So how do Google Maps and a dedicated app differ in day-to-day use? Here is how they compare.
Comparison
Both methods automatically keep a record of the places you visit, but they differ in the level of detail recorded, how easy it is to export your data, and what you can do with your history afterward.
| Feature | Google Maps (Timeline) | Dedicated Location History App |
|---|---|---|
| What Gets Recorded | Visited places and travel routes saved on a map and timeline | Visited places with arrival times, departure times, and stay durations |
| Export Options | Manual location-history.json export from Google Maps settings | Varies by app; some support text or external note exports (for example, the app introduced below can automatically export the previous day's log to Markdown or Notion every day once configured) |
| How You Use It | Picking a past date inside Google Maps to check where you went | Reviewing clean daily timelines in-app or building a personal journal and life log in external tools |
If you just want a quick way to check where you went on a specific day inside a map app you already use, Google Maps is convenient.
On the other hand, if you want clear arrival/departure times and stay durations—or want your visits exported into your own note-taking app as a daily log or journal—a dedicated app is a better fit.
Let's walk through the screens and setup steps for both options.
Google Maps
Many iPhone users already have Google Maps installed, and its built-in Your Timeline feature lets you start logging visits automatically without downloading another app.
How It Works in Everyday Use
Once Timeline is turned on, Google Maps automatically groups your daily travel routes and the shops, restaurants, and venues you visit by date.
To look back at a past day, open Google Maps, tap your profile picture or initial in the top right, open Your Timeline, and pick a date from the calendar. If you want to remember the name of a spot you stopped by last Saturday, you can trace your route and see the place names right away.
If you want a copy of your saved data, tap your profile picture in the top right of Google Maps, go to Settings → Location & Privacy → Export Timeline data, and save the exported location-history.json file. Because JSON is structured for software rather than casual reading, it is not ideal for reviewing directly as a journal or personal note. Most people simply browse their history inside the Google Maps app.
How to Set It Up
To start automatic tracking in Google Maps, check two things: your iPhone's location permission for Google Maps and the Timeline setting inside the app.
In Google Maps, tap your profile picture or initial in the top right, then open Settings → Location & Privacy (you can also open Your Timeline → More … → Location & privacy settings). (Note: the two screenshots below were captured on a Japanese-language iPhone.)
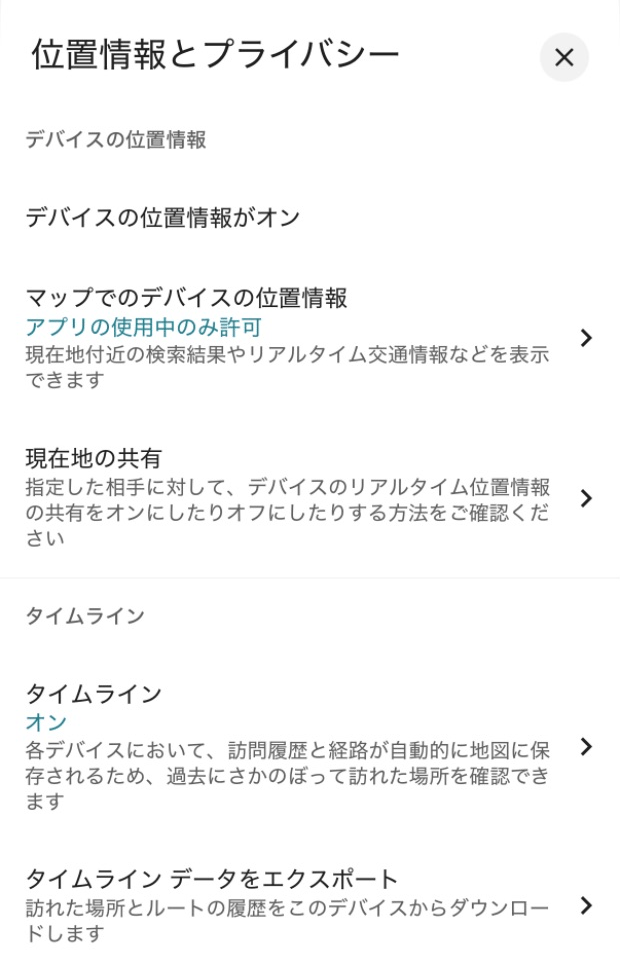
Tap the device location access row to open iOS Settings for Google Maps, then tap Location and select Always.
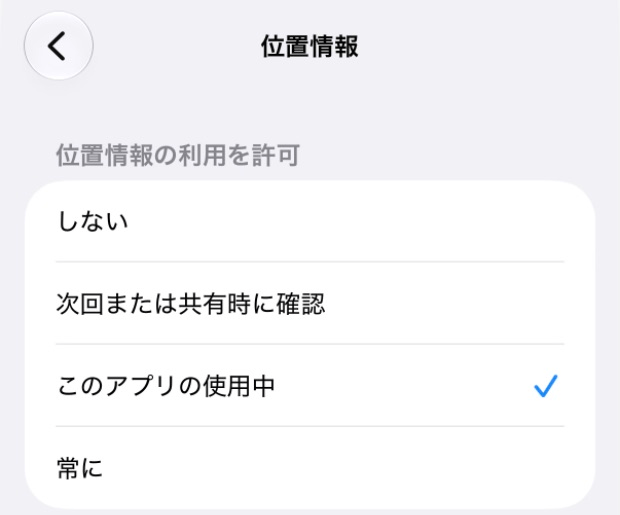
Return to Location & Privacy in Google Maps and check Timeline. If it says Timeline is off, tap it and follow the on-screen prompts to tap Turn on.
Official Google Maps Timeline instructions for iPhone
Tracking with a Dedicated App
Google Maps is handy for glancing back at routes on a map, but it can feel limiting if you want exact stay durations or want your location history saved directly into your own notes or journal. Dedicated life-log and iPhone location history apps are well suited to those needs.
How Dedicated Apps Record Visits
Most dedicated visit-tracking apps combine iOS visit detection with their own visit-recognition logic to record where you stayed, when you arrived, and when you left.
Instead of just plotting raw location dots on a map, they organize your day into discrete stays—showing exactly how many minutes or hours you spent at each place—so you can review your day as a clean chronological log.
Setup is straightforward: follow the onboarding prompts when you first open the app and set iPhone location access to Always so automatic background logging can run without opening the app.
Introducing Silica
One dedicated app built for this workflow is Silica, a location history app for iPhone.
With Silica installed, the places you visit each day—along with arrival times, departure times, and stay durations—are automatically recorded and organized into a chronological timeline without needing to open the app throughout the day. You can tell at a glance which shop you visited on a given day, when you got there, and how long you stayed.
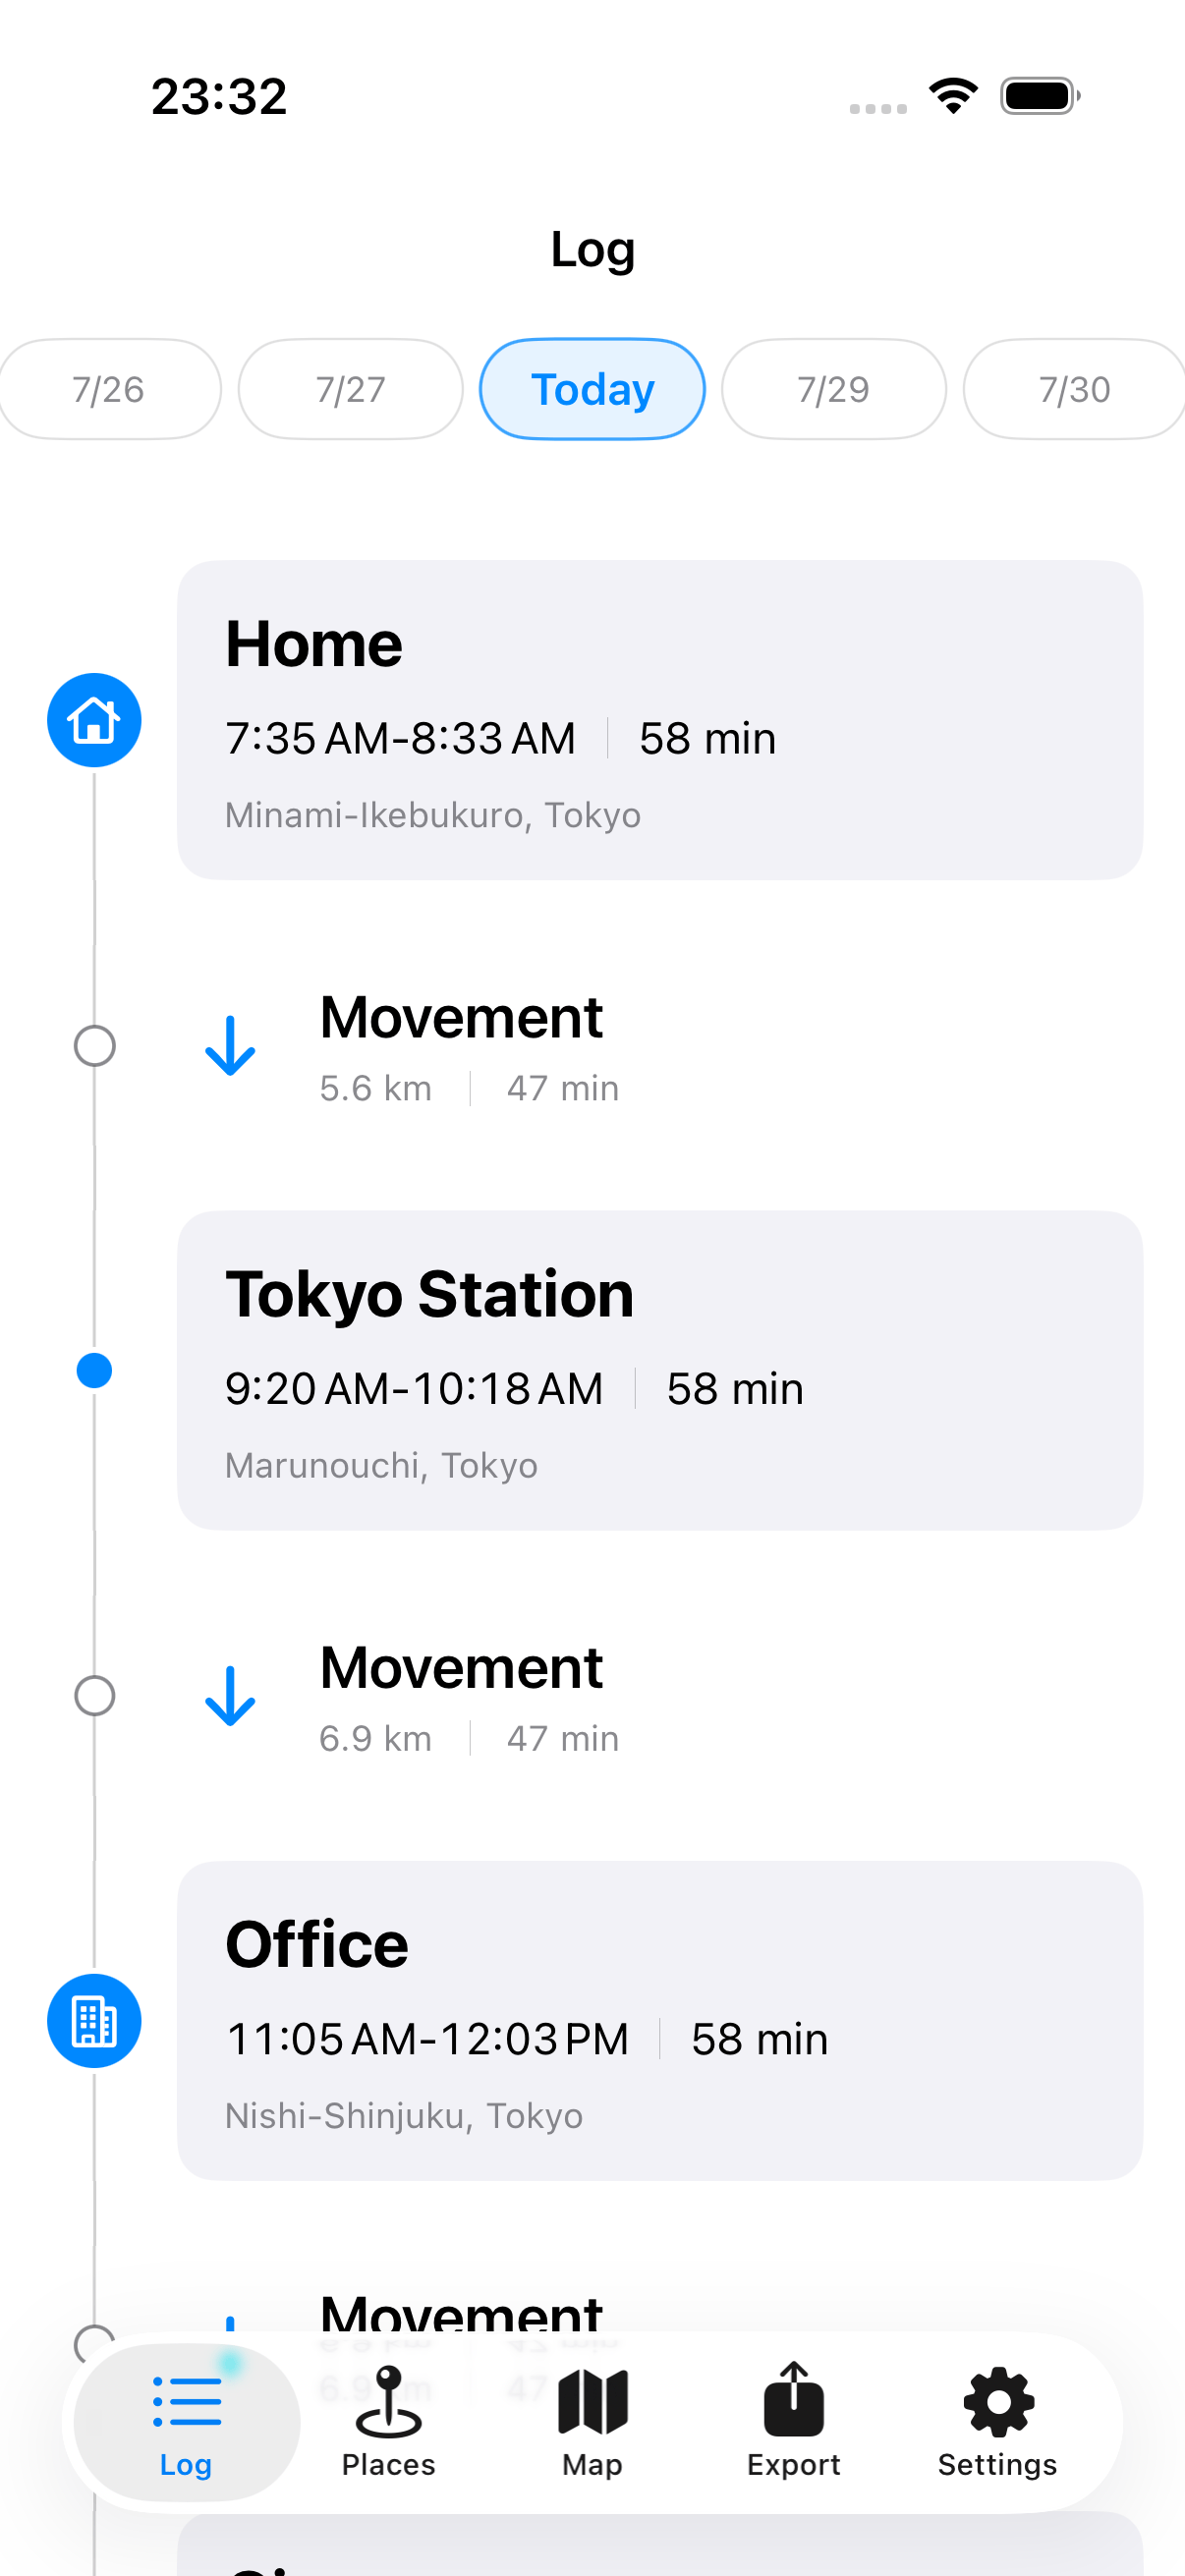
Where Silica really stands out is getting your history out of the app. While Google Maps only offers manual JSON exports, Silica lets you configure an export destination and turn on automatic export so the previous day's visit history is automatically exported every day to Markdown files or Notion.
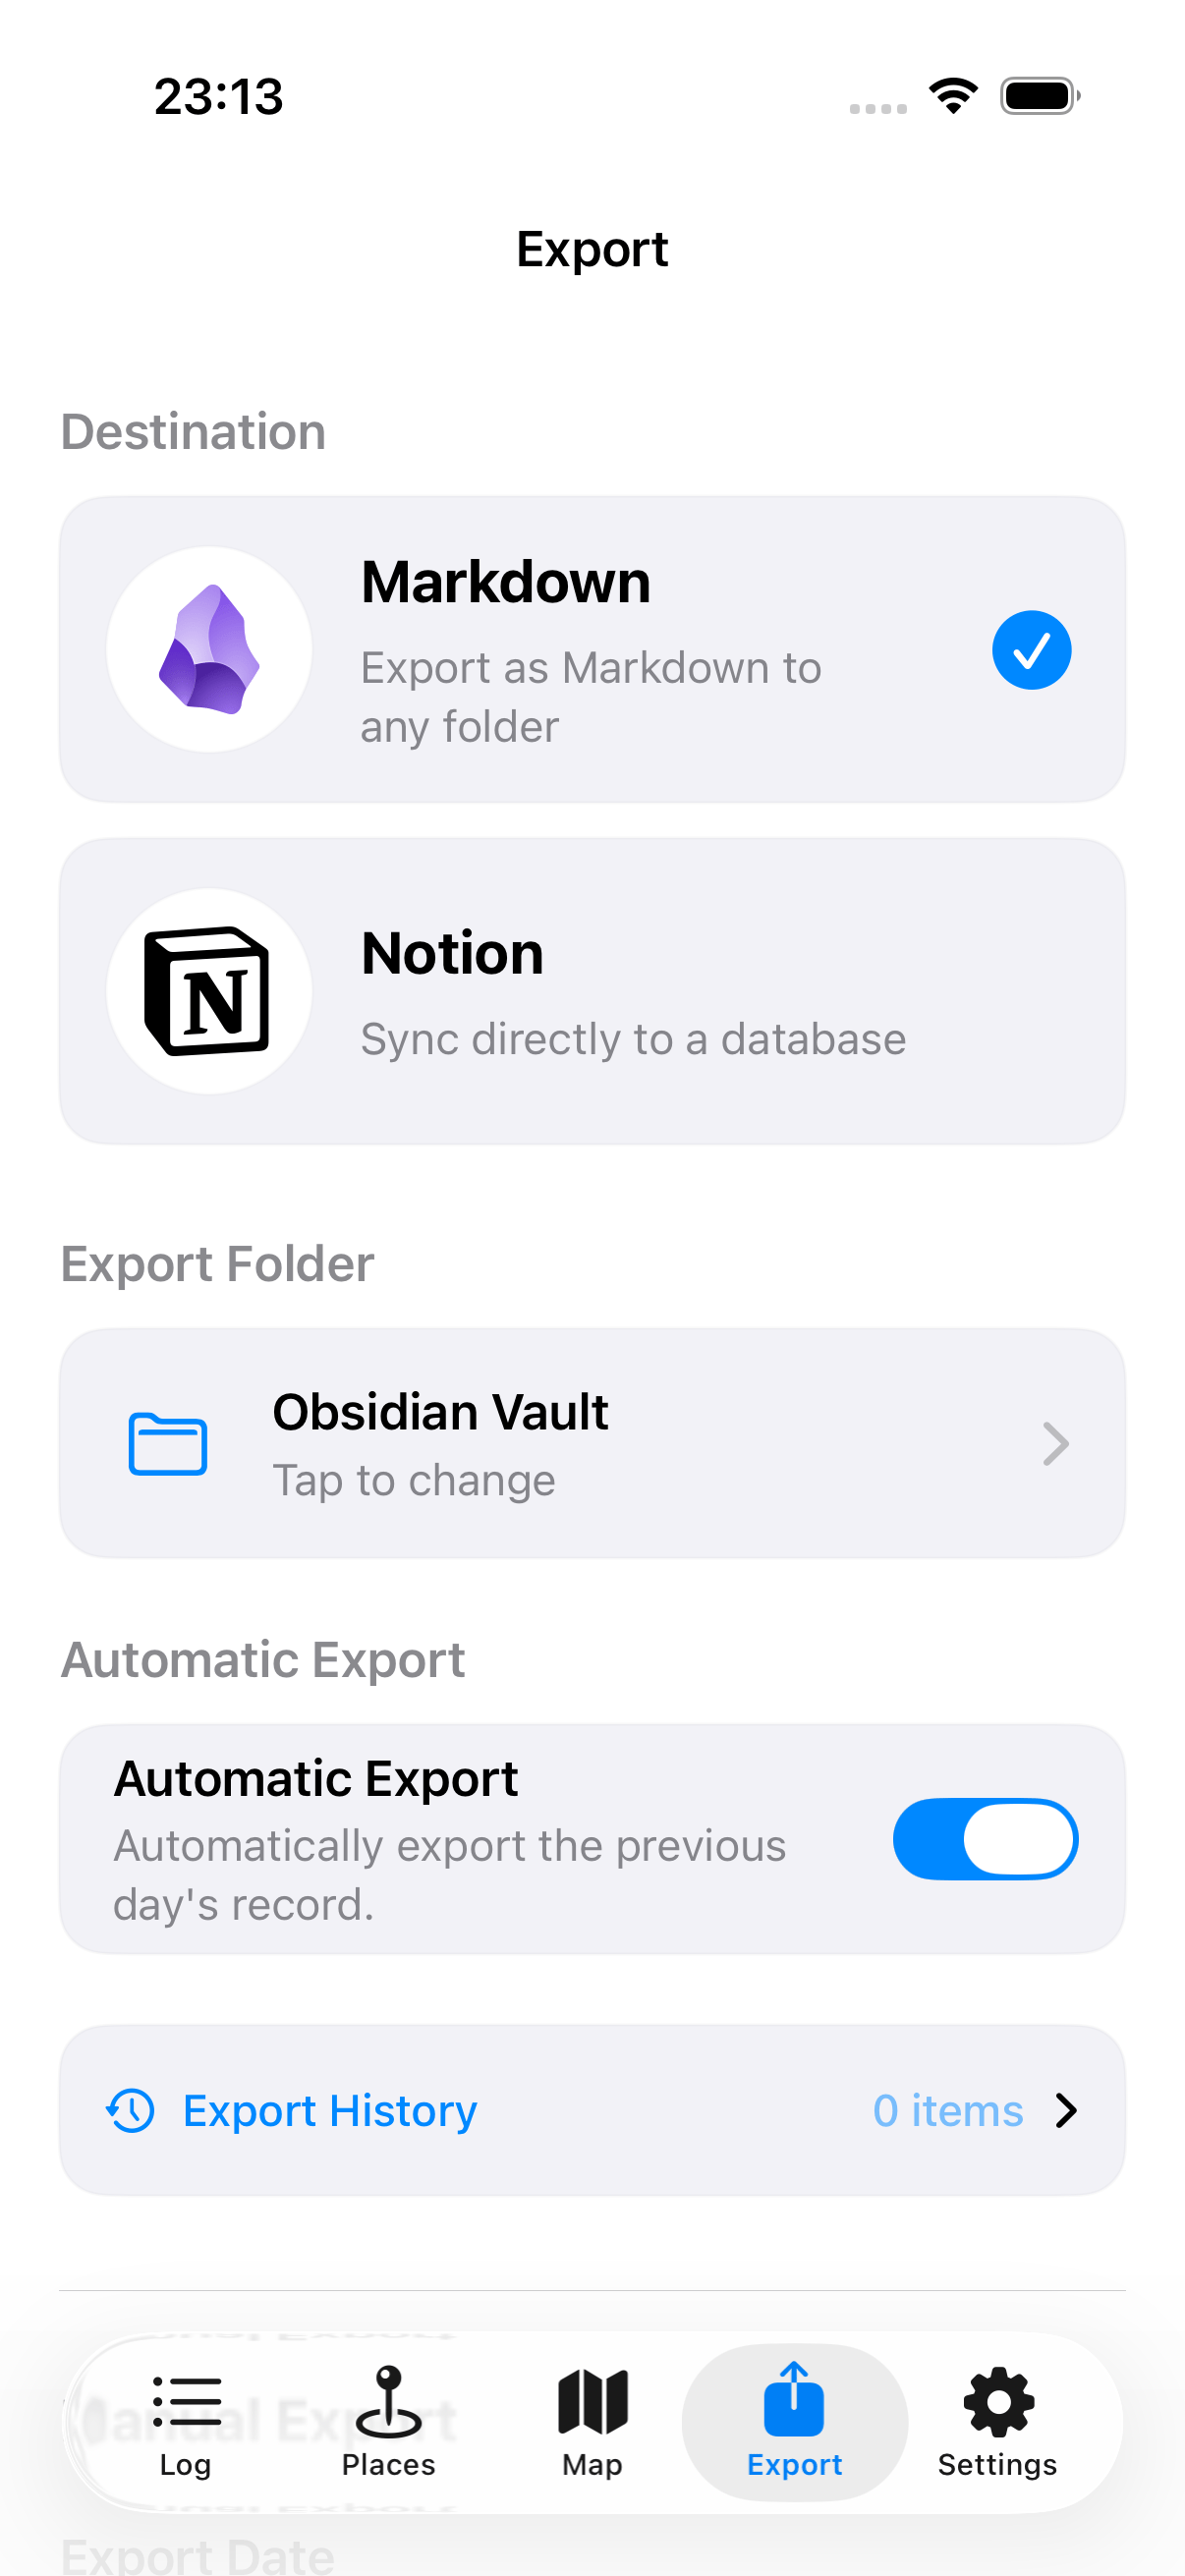
Without any manual export steps, yesterday's stay log arrives automatically in Markdown-based apps like Obsidian or in your Notion workspace, ready to use as a journal draft or daily review note.
You can also feed your exported history to the AI tools you already use. Ask "How many times did I go to the gym last week?" and it can answer directly from your actual visit records.
 silica.fuji-maki.meSilica | Automatic Location History for iPhoneAutomatically record the places you visit and how long you stay. Export to Markdown or Notion and use your logs with AI.
Summary
When your iPhone automatically tracks the places you visit, forgetting to write down a restaurant name or snap a photo is no longer a problem—you can simply check the date and find it right away.
The best option depends on how you want to look back on and use your records:
- Google Maps: Best if you want an easy way to look back at travel routes and stops inside the map app you already use.
- Dedicated App (such as Silica): Best if you want a clean timeline with stay durations, plus automatic daily exports to Markdown or Notion for journaling, personal notes, and AI review.
With either approach, once you set location access to Always and turn tracking on, all you have to do is carry your iPhone as usual. Pick the one that fits how you like to review your days and give it a try.